
va_rider
Wizard
This tutorial will be the first in a list of many I'm planning on doing. If there are special requests for tutorials, let me know, and I'll do what I can. This is rather picture intensive, but goes step by step for the people who have never done this before, to include some tricks and tips along the way.
Fork Removal:
Forks need to be removed occasionally for upgrades, and for basic maintenance. Some people fear working on their own bike, of fear that they don't have the tools or knowledge to do so. The purpose of this tutorial is to remove the mystery, and show how easy it really is.
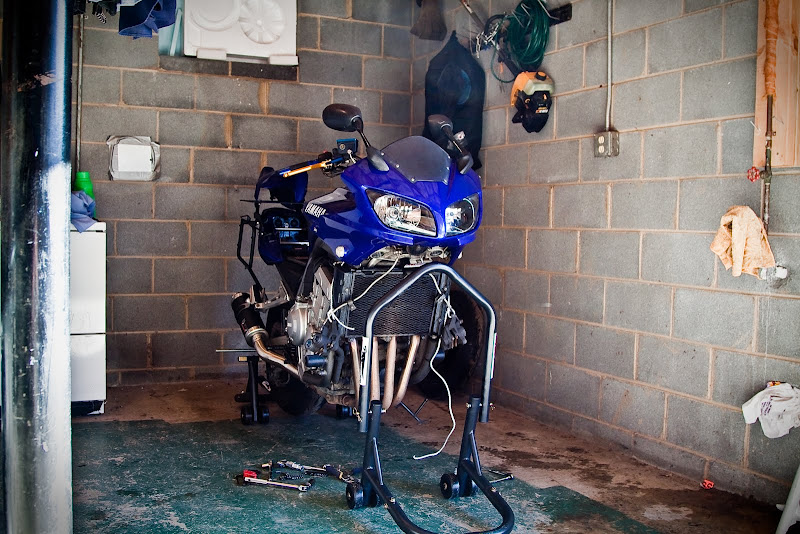
First off, you'll need the typical tools that you'll need to do any of the work on the bike. In this case, a 12mm, 10mm, and a set of allen wrenches. You'll also need a set of front and rear stands to remove the forks. (Rear stand is mandatory. Front stand can be substituted by using rag covered jack stands either on the frame or on the frame sliders. However, if you plan on working on your bike on a regular basis, saving money on tire changes, going to the track, or even storing the bike for a period of time, I'd recommend buying a set of stands. They can be had for roughly $150-$160 on eBay for both. Drop me a PM if you need to know where.)
Front Stand:
Rear stand:
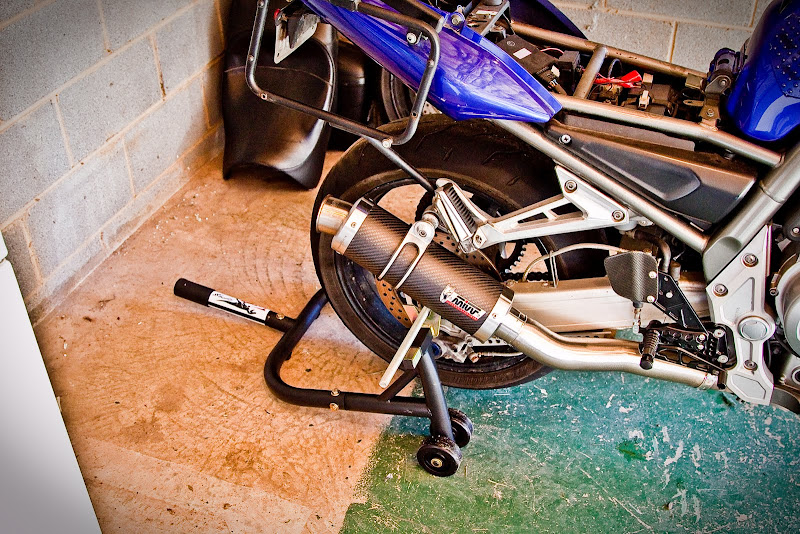
Note, the rear stand isn't being used as intended... it's intended for a bike with spools... the Gen 1 doesn't accept spools... I have new arms for the rear stand that should be delivered soon.
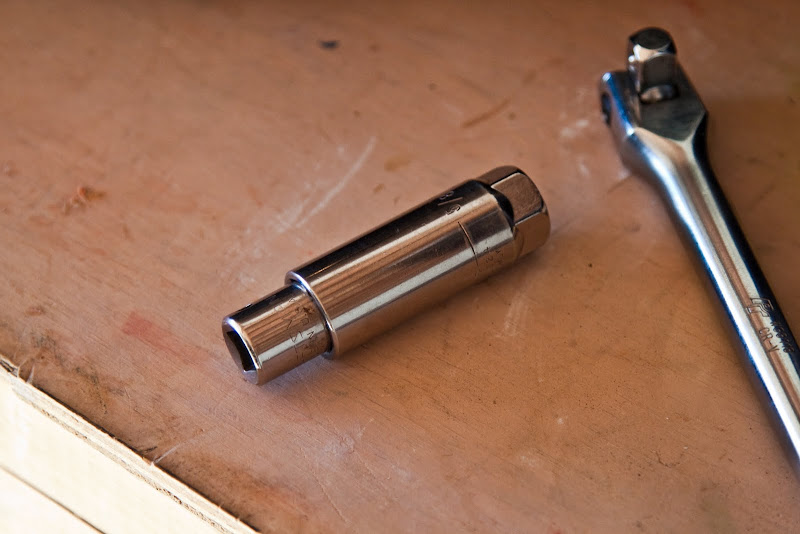
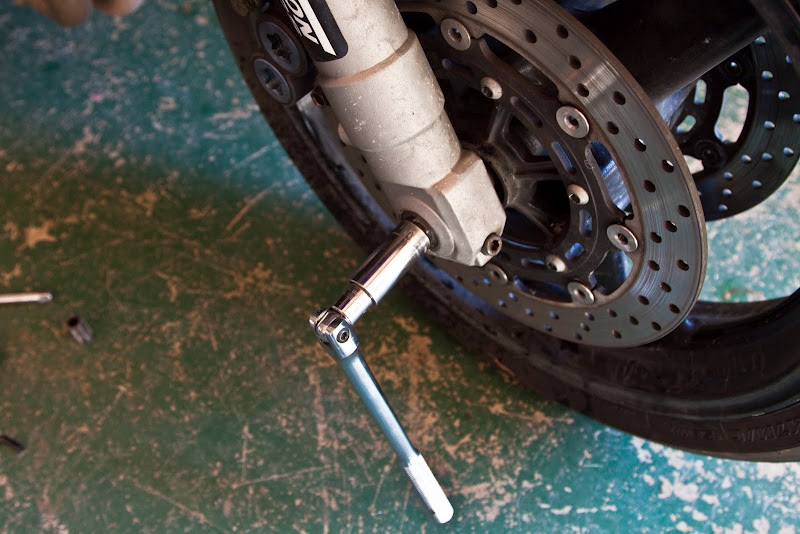
So, you should have all of the normal tools, the one thing you might not have is the front axle tool. Or, that is, you don't think so do.... but... take a look in your tool box, and you'll find that you do.
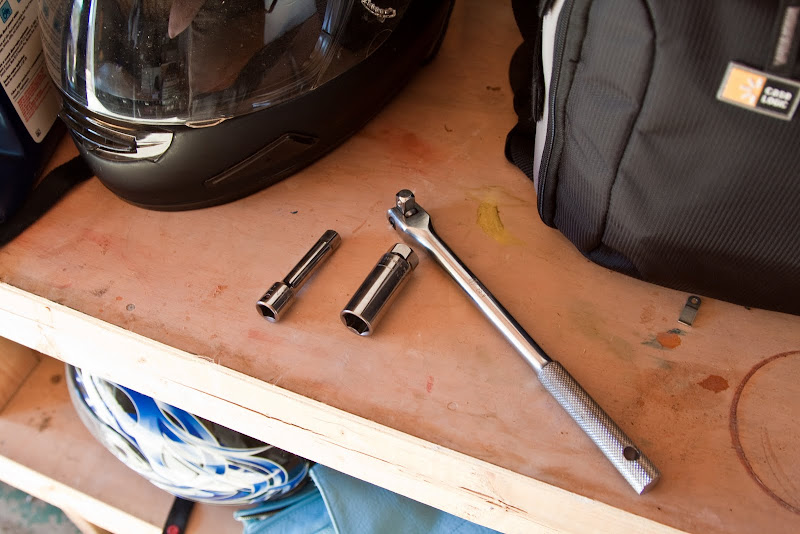
Yep. It's really that easy. Grab a 3/8" drive 5/8 Spark plug socket. Flip it around backwards, and notice that it's a perfect fit for the front axle. Take a screwdriver and push out the rubber on the inside of the socket, and push a 3" extension through the socket backwards. That's your completed axle tool.
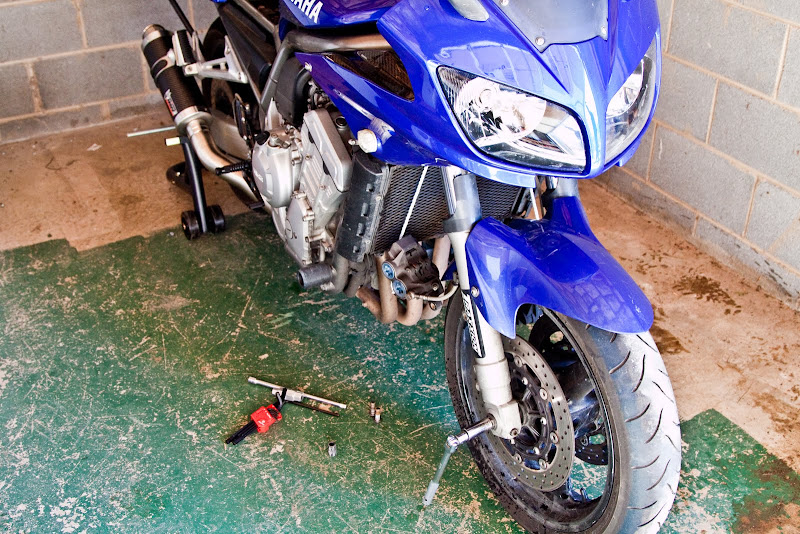
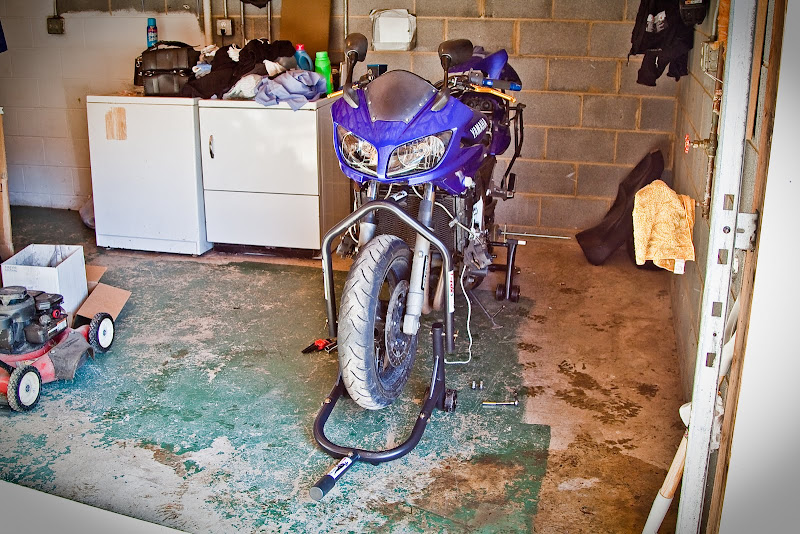
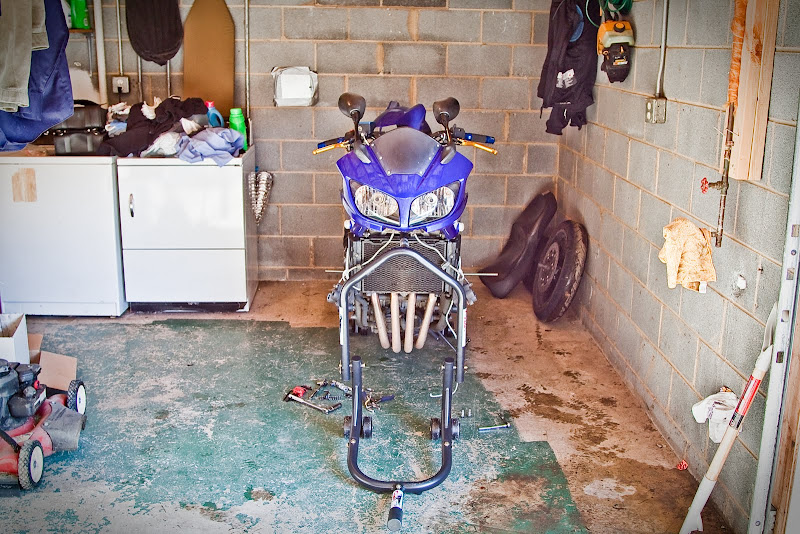
Now that the calipers are out of the way, and the fender is sitting somewhere safe, it's time to get the bike up on the front stand.
The pin on the stand is 20mm. There is a rubber cover on the hole in the bottom of the triple tree. Pull that rubber stopper out and slide the front stand into place. Insert the pin section of the stand into the hole in the triple tree as shown. Then, press on the handle of the stand to get the front tire off of the ground.
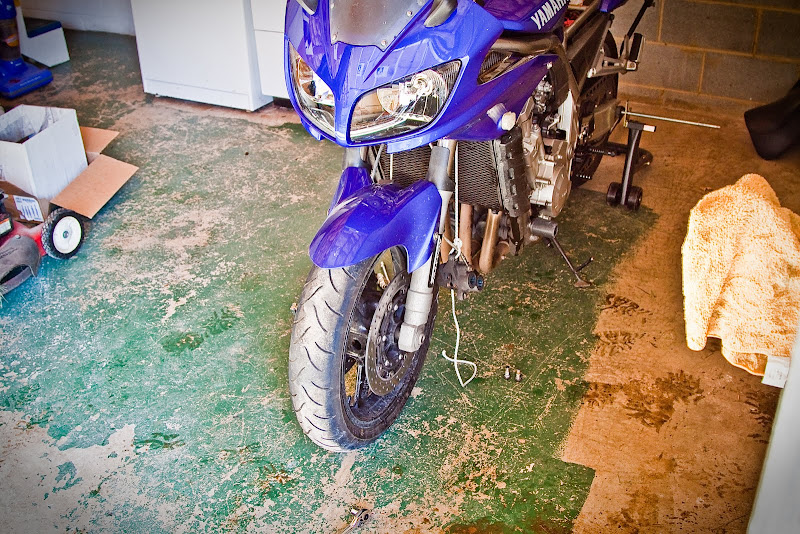
Now, take the front wheel off. Since you loosened it up on the ground, you should be able to spin it out by hand. Get it all of the way loose, then support the wheel as you pull the axle out. Set the wheel and axle to the side.

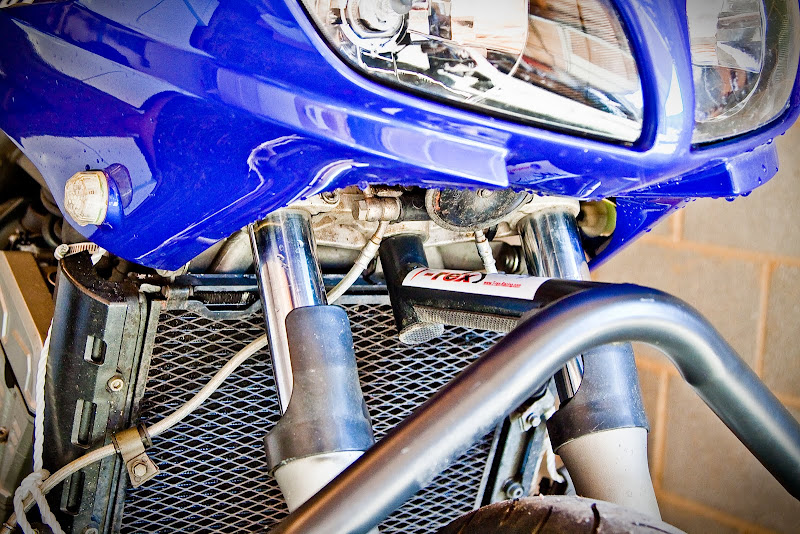
Now, you're almost ready for the forks to come out. Each fork is held in place by 3 allen bolts. One up top, and two at the bottom.
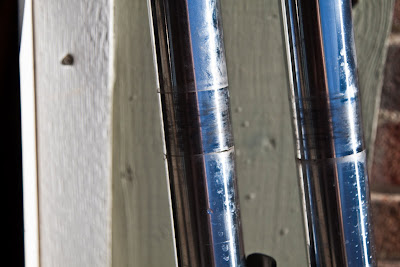
(On the picture on the left, you can see the forks set at 7mm above the triple tree. This is the fork height "mod" we're frequently talking about on the Gen 1 side of the house.)
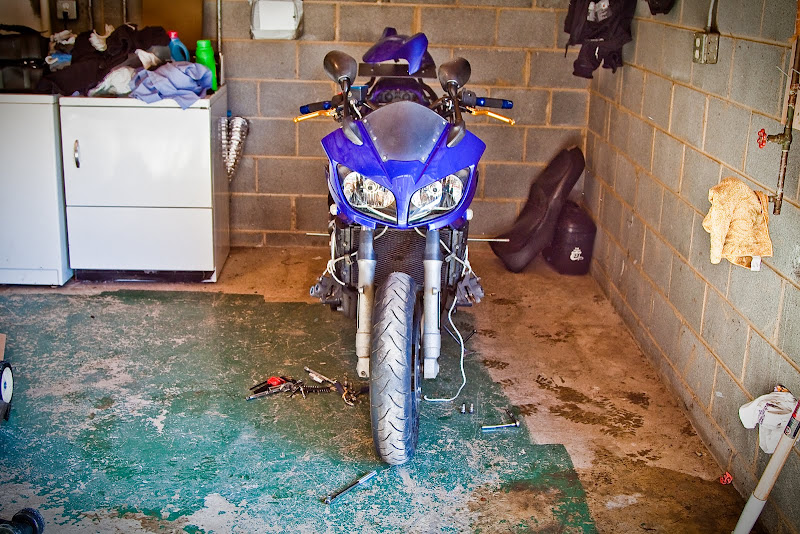
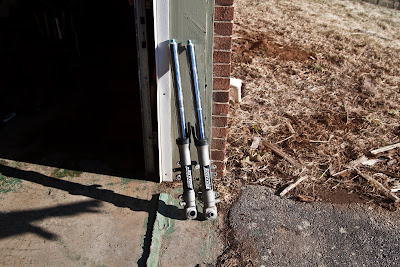
and it's that easy. Here's the bike with the forks off:
And my forks:
This if from the lower triple... I'll be asking Lee about this...
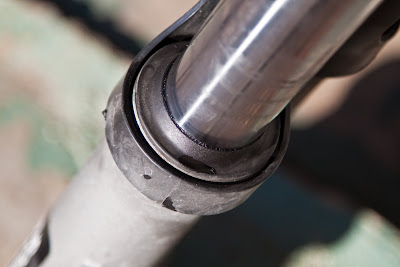
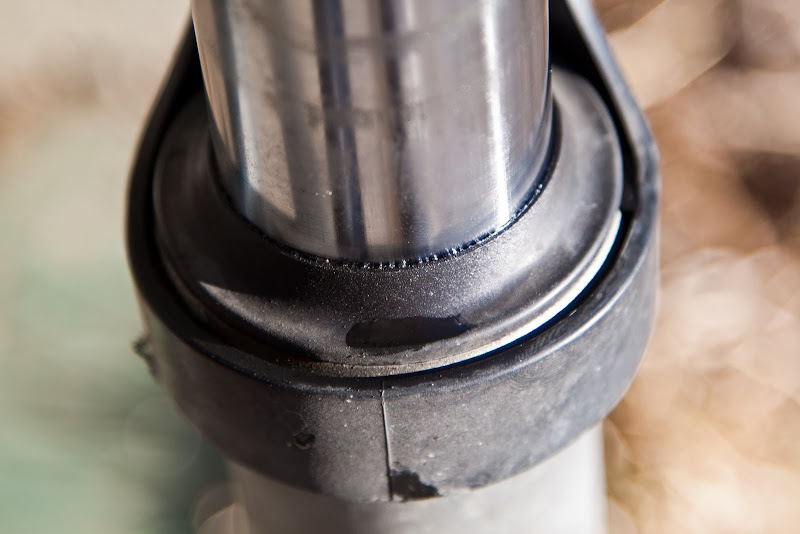
My crappy seals:
So... Tuesday, we go to Traxxion Dynamics. More pictures will follow from there.
Also seen above: Bluing on the front tire. Bluing is cause by overheating the tire.
Fork Removal:
Forks need to be removed occasionally for upgrades, and for basic maintenance. Some people fear working on their own bike, of fear that they don't have the tools or knowledge to do so. The purpose of this tutorial is to remove the mystery, and show how easy it really is.
First off, you'll need the typical tools that you'll need to do any of the work on the bike. In this case, a 12mm, 10mm, and a set of allen wrenches. You'll also need a set of front and rear stands to remove the forks. (Rear stand is mandatory. Front stand can be substituted by using rag covered jack stands either on the frame or on the frame sliders. However, if you plan on working on your bike on a regular basis, saving money on tire changes, going to the track, or even storing the bike for a period of time, I'd recommend buying a set of stands. They can be had for roughly $150-$160 on eBay for both. Drop me a PM if you need to know where.)
Front Stand:
Rear stand:
Note, the rear stand isn't being used as intended... it's intended for a bike with spools... the Gen 1 doesn't accept spools... I have new arms for the rear stand that should be delivered soon.
So, you should have all of the normal tools, the one thing you might not have is the front axle tool. Or, that is, you don't think so do.... but... take a look in your tool box, and you'll find that you do.
Yep. It's really that easy. Grab a 3/8" drive 5/8 Spark plug socket. Flip it around backwards, and notice that it's a perfect fit for the front axle. Take a screwdriver and push out the rubber on the inside of the socket, and push a 3" extension through the socket backwards. That's your completed axle tool.
- So, gather your tools and put your bike on the rear stand.
- Loosen the pinch bolt on the front axle with an allen wrench.
- Loosen the front axle by about one turn. (You don't want to have to loosen the front axle while it's up in the air.)
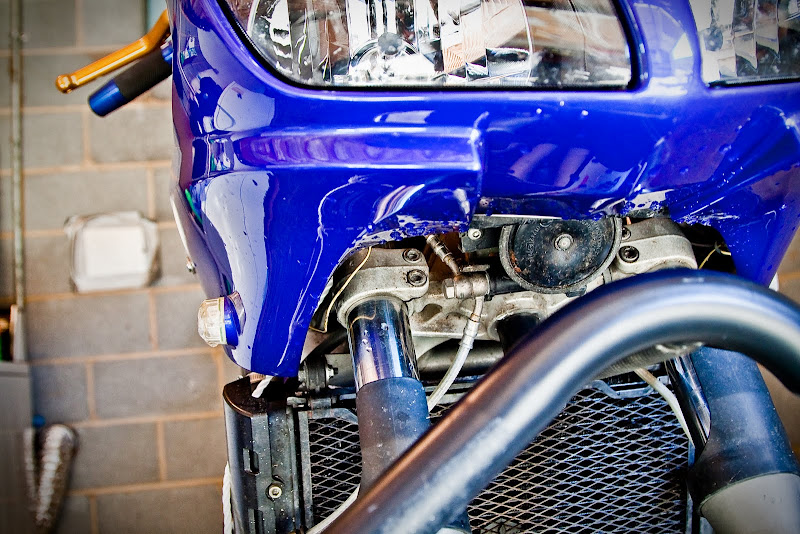
- Loosen and remove the 12mm bolts on each brake caliper, and pull the calipers off of the rotors. Also, there are 2 8mm bolts holding the brake lines in place on each side of the fender, remove those.
- Slip a rope / string / piece of wire through a bolt hole in the caliper to keep them from swinging around and hitting things.
- Next remove the front fender.
- 2 Bolts up front (Philips are stock), and 2 bolts in the back (8mm w/ nuts on the backside)
- After removing the bolts, remove the fender by pulling forward and up.
Now that the calipers are out of the way, and the fender is sitting somewhere safe, it's time to get the bike up on the front stand.
The pin on the stand is 20mm. There is a rubber cover on the hole in the bottom of the triple tree. Pull that rubber stopper out and slide the front stand into place. Insert the pin section of the stand into the hole in the triple tree as shown. Then, press on the handle of the stand to get the front tire off of the ground.
Now, take the front wheel off. Since you loosened it up on the ground, you should be able to spin it out by hand. Get it all of the way loose, then support the wheel as you pull the axle out. Set the wheel and axle to the side.
Now, you're almost ready for the forks to come out. Each fork is held in place by 3 allen bolts. One up top, and two at the bottom.
(On the picture on the left, you can see the forks set at 7mm above the triple tree. This is the fork height "mod" we're frequently talking about on the Gen 1 side of the house.)
and it's that easy. Here's the bike with the forks off:
And my forks:
This if from the lower triple... I'll be asking Lee about this...
My crappy seals:
So... Tuesday, we go to Traxxion Dynamics. More pictures will follow from there.
Also seen above: Bluing on the front tire. Bluing is cause by overheating the tire.
Last edited:
")