six3seven's '14 FZ1N Build Thread

six3seven

Well-Known Member
This will be my second Aussie FZ1N build, and the direction I'm taking is pretty much set.

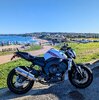
Let's start with my last FZ1 (before I fitted the '06 R1 header):

1660259462910.png
 
Last edited:
Picked this bike up 29 July 2022.

Issues immediately apparent:
- Steering stem bearings need attention
- There *was* an oil leak from somewhere, would need investigation, could just be the oil filter wasn't buttoned down. Dry oil everywhere.
- Fuel tank has a large but shallow dent
- Rear fender cover (tail lamp surround) has a couple of broken tabs
- Fender eliminator is ugly and chincy, and indicator mounts are upside down

Things I like:
- Dominator exhaust looks neat
- Vortex rearsets
- Nice SD-R levers
- Good quality LED indicators, with an LED flasher (not resistors)
- Colour scheme is quite fetching (I don't typically like the red/white Yamahas)

24,xxxkm bike. $6,500AUD.

1660259622754.png
 
Investigating the oil mess led me to remove the oil pump cover...

The cover itself is cracked, and has been 'repaired' with JB weld. In this photo I have already chipped away some of the JB weld from the other side of the webbing, and it's clearly cracked.

1660260668596.png

In this photo you can see the thread is practically obliterated. For context, this is an oil cover, it's about as structural as a rocker cover on your car, it just needs to keep the oil inside. The torque on these bolts is pretty minimal. My theory is the bike fell on its side, contacted the bolt, cracked the cover, ad broke the thread.
1660260714498.png

Here I have drilled deeper into the web for the bolt. I used plenty of grease and rags to catch the mess I was about to make. My goal here is to acheive at least 3 full turns of thread while taking out the minimum material.
1660261101858.png

Since the cover was cracked, and I needed a new one anyway, I bought a tasty Woodcraft cover. It's also stronger than the OEM, so I can torque that one bolt down a little less and not have a leak past the gasket. The Woodcraft gasket is a really nice foam bonded stainless part, and is included with the cover.
Since the web that would seal the bolt thread off against the cover is now missing, the bolt thread is now exposed to oil. The bolt face needs to be treaded like a sump bolt to seal the oil in. For now I am using a fibre washer, which is sealing the oil in. I intend to replace it for an aluminium one for aesthetic reasons, but a copper washer would do fine also.
1660261226224.png
 
Something a little more fun than fixing broken things..

1660262862207.png

ECU is out, boxed, and ready to ship. Taking the WR250R one a week-long ride tomorrow. Ivan's not back until 5 September, so I reckon I'll ship the ECU off ~ 30 August.
 
Picked this bike up 29 July 2022.

Issues immediately apparent:
- Steering stem bearings need attention
- There *was* an oil leak from somewhere, would need investigation, could just be the oil filter wasn't buttoned down. Dry oil everywhere.
- Fuel tank has a large but shallow dent
- Rear fender cover (tail lamp surround) has a couple of broken tabs
- Fender eliminator is ugly and chincy, and indicator mounts are upside down

Things I like:
- Dominator exhaust looks neat
- Vortex rearsets
- Nice SD-R levers
- Good quality LED indicators, with an LED flasher (not resistors)
- Colour scheme is quite fetching (I don't typically like the red/white Yamahas)

24,xxxkm bike. $6,500AUD.

View attachment 27542
Beauty
 
Righto, I'm back from the Ride ADV 2022 Bridge to Bridge. Had a blast holding the throttle pinned on the little WR250R, and do recommend for anyone in Australia wanting to do a supported ADV event.
1662104178861.png

The MPDR people didn't respond to my enquiry, so I decided to have a go at the tank dent repair myself:
1662104457996.png 1662104477968.png

Process was basically to take a solid 4x4" hardwood stake, round the pointed end to have about a 1" rounded end, remove the fuel pump, access the back of the dent via the fuel pump recess, heat the tank to the point where it's too hot to touch, then gently lever the dent to gradually roll it out. The heat will make the paint and steel more pliable. All in all, it was a free attempt, and unless you know it was bent, it's pretty hard to see where the dent was.

A stack of parts arrived while I was away:
1662103369032.png 1662103440245.png 1662103502178.png 1662103547771.png 1662103697315.png

Had a little time spare this afternoon, so rebuilt the 2009 R1 calipers:
1662103769103.png

Installed the calipers on the 2008 R1 forks:
1662103910029.png
 
Almost a month since an update, I'll try to put together what I've been up to. Here's a before photo, just for reference. This photo is basically 'as bought', just with a set of cheap bar end mirrors I had laying around. I quickly realised why they were just laying around and not on a bike, they are terrible CRG knock offs. The CRG mirrors are awesome, I had some on my Buell XB12S and previous FZ1N. The Chinese copies are a waste of $30. They're in the bin now.
1664498217936.png

Built a loft for my step daughter, which put a pause on working on the FZ1, but was a worthwhile project, especially for the Dad points. Don't worry about the fan, the house has A/C and the fan doesn't get used. She's been redecorating the room since then.
1664498526987.png 1664498805207.png

Ivan's ECU turned up. Turn around his end was extremely quick, same day service and dispatch. Shipping time was about 4 business days each way. Followed all his instructions for idle and TPS adjustment. Easy, but more importantly, a lot less effort than the way we used to modify these bikes with FCE, throttle plate modification, and power commander. Took the opportunity with the tank up to remove the O2 sensor and put a bung in the hole.
1664495176414.png

I fit and balance my own tyres, was doing it for the dirt bikes for years, doing road bikes takes a little more care but is no more challenging. Part of the reason I do my own is it's a great time to pay attention to wheel bearings and general wheel/brake condition, but also because I balance my wheels/brakes before fitting the tyre. Tyre shops will fit the light part of the tyre (barcode or dot) aligned to the valve stem. Here you can see the heavy point of the wheel is almost 80* out from the valve stem.. so I mark the inside of the wheel with a spray can, and will always align the tyre to that mark. This minimises the amount of weight required to balance the tyre. Red annodised valve stem, 90* type because checking tyre pressure should be easy. 300mm Discs are Metal Gear brand, I've used these guys for discs almost exclusively since they were so brilliant in assisting me work through the motard conversions we did a few years ago. They are 200g each lighter than the OEM discs with steel carriers, so a 400g saving in rotating mass and unspring weight; great for handling.
1664495588773.png

2019 R1 shock is fitted. Overall, I really like this mod; cheap, quick, easy, and has a really good outcome. It's no Penske like I had on my last FZ1, but currently is one tenth the cost, too. Modification of the upper bush was trivial, removed the bushes from the shock, used an appropriately sized bolt to align the bush on a piece of angle bracket, and used my bench disc to take the material off the face perpendicular to the axis. Measured with digital calipers often to ensure I didn't go too far. Light coat of zinc spray to prevent rust. Fit perfectly with a little bit of a shove, so a snug fit. Length of shock adjusted to the OEM FZ1 length of 320mm. Preload is set as high as I'm willing to go resulting is about 12mm of bike sag, rider sag is a little more than I'd normally like (about 5mm off my target), but it's close considering my 92kg (~200lb) dadbod. Clickers set to Sport Rider settings as a baseline. Rectifier fitted above the tray. Rear master reservoir relocated on a stainless bracket left over from another project. Braided brake hose fitted. No other rear brake modifications. Fitted the extra quiet insert in the Dominator exhaust which should knock about 6dB off. A lot quieter but still loud, glad I didn't opt for the other quiet insert, apparently it's 3dB louder. Michelin Road 6 in a 190/55, so should give a sportier attitude. Rear shock might be shortened up if the bike needs more stability with the taller tyre and shorter forks.
1664495767571.png 1664495802076.png

The headlight bracket frame on these bikes rusts. My greatest gripe with Yamaha for these bikes is that the surface coating was absolute rubbish, and to remove it to paint, the wiring loom for the ignition, immobiliser, and throttle side switch gear must all be removed. What a PITA. Anyway, I had the headlight off, forks out, tank up, and was pulling the triples off to re-grease and tension the head stem bearings, so I pulled the frame and painted.
1664496392841.png

Front end went back together. Seering stem bearings were in great condition, had clearly been greased before, but needed more tension. I suspect the tension nuts had worked loose. Cleaned, fresh grease, reassembled. Spent $3 on a copper crush washer to replace the chincy rubber one that comes from factory. Bearings shouldn't come loose again. '08 R1 Forks are 12mm shorter than OEM, so fitted the tops flush with the top triple. Clickers set to Sport Rider setting for the '08 R1 as a baseline. R1 axle is required because the bottom of the R1 forks is different. 2009 R1 calipers fitted up to the 300mm discs. Braided hoses. FZ1 hose hanger is different to the R1 hanger, so one of the locating tabs requires flattening. These 300mm discs and the slimmer calipers make getting the wheel on and off a lot easier too. Michelin Road 6 tyres are my weapon of choice. Rim stickers removed because I never like rim stickers, they aren't permanent enough, and I hate trying to keep them looking nice. Front fender was broken!! Didn't realise on original inspection, but is had been repaired (poorly) and there was goop and glue everywhere on the underside. Once I saw where the repairs were, I could find the hairline marks from the outside. If it failed again, the entire clutch side of the fender would come apart.. no bueno. I found a used black one for $36, painted it matt to black out the front end. I really like it.
1664496870052.png

Added a Renntec grab rail for the Misso, and a Givi EA131 Tanklock tank bag. Tail tidy is a Mustard Bikes unit, I like them because you can spec the indicator mount type you want, so I went with 10mm for aftermarket indicators. Rear indicators are Moto Gadget mo.blaze which are only 8mm stems, but a couple of O-rings on the stem ensures the 8mm thread is centered in the 10mm hole. Added a rear reflector because highway patrol in NSW can be dicks about the silliest things. Grips are Oxford fat grips. Risers are Neken 1-1/8" w/10mm mount bolts. Bars are Pro Taper Mini Low.
1664497252381.png

Really quick test ride and I'm happy with how tight it rides. Brakes aren't broken in yet but that Brembo RCS19 is brilliant.

Next update will be mirrors and GPS,
 
Did a shakedown run Newcastle - Brisbane and back. 867km north in one day, in the pissing rain, and 925km south on a gorgeous sunny day a week later.

Photos from the trip up:
1667962054280.png 1667962098063.png 1667962130052.png

Plenty of roadworks, a flat tyre, and a stretch of about 150km where some donkey had obviously forgotten to cap their fuel tank all made for an interesting day. In the end, I truncated the planned trip to make up time lost in Armidale trying to repair a flat tyre. I'm guessing I picked something up on one of the many stretches of roadworks.

Photos from the trip home:
1667962297173.png 1667962320760.png 1667962351054.png

It's amazing the difference a week can make.

Hepco and Becker C-Bow system is a revelation in luggage transportation. Coupled with the Givi Tank Lock, I was able to carry enough for a week away.

Dominator GP pipe is either too loud (open), or far too restrictive with the dB Killer installed. It came with the bike, and I was trying to like it, but it's going to have to go in favour of something longer and quieter.. I have something in the works.

Rear shock spring is too light. I've ordered a 120N spring to put in it, should be here in the next few days. Otherwise, the R1 suspension is a great upgrade. Apart from the flat, which is hardly the tyre's fault, the Road 6 tyres have been brilliant. I wasn't pushing too hard (nearly 1,000km to do in a day) because I wanted to make it home, but the bike was loaded with luggage, and to be honest, in the twisty stuff the front end was planted.
 
Base of the side stand was pretty worn, so I repaired it and took the opportunity to make the base a little larger.

1667979107479.png 1667979129104.png 1667979163357.png 1667979186564.png

Fitted some NK risers, Pro Taper Mini-low bars, Ram ball mount, lockable Zumot XT mount, and Moto Gadget glassless mirrors.

1667979417269.png 1667979434907.png
 
Today's update..

I scored a 2004 R1 header for $180 AUD delivered, so I cut the up-bend off the end of the header, notched the hanger bracket, and prepped it for fitting. I also have another spare link pipe from different slip-on, and the inner/outer diameters just happen to be a perfect fit, so I cut down the bend of that link pipe to what I needed so as to marry the R1 header pretty closely to the OEM FZ1 outlet location and direction. The R1 support bracket will be bolted to the clutch side FZ1 hanger with a tube spacer for support. R1 EXUP valve is lock wired open, but will potentially have a custom control added to quieten the system when I'm in my own neighborhood, etc.. but this certainly isn't necessary.

I left the Dominator oval can fitted to the original location when I disassembled the OEM header from the bike and used it as a reference when test fitting the extension location, length, and angle. Fits pretty neatly. Just need to weld the flare at the header end to the extension, and assemble the pipes with aviation hose clamps. Being Christmas, I couldn't get my hands on any stainless wire for the mig, so just pausing here waiting on supplies.

2004 R1 Vs. GENII FZ1:
1672372662056.png 1672376488683.png

2004 R1 header cut and test fit:
1672371994131.png 1672372022881.png

Why would I use the R1 Header? Aren't the R1 primary pipes tuned for HP? Won't I lose torque going from 4-2-1 to 4-1?? Am I mad?!?!

The R1 header is titanium and weighs a considerable amount less than the OEM stainless (<2kg Vs. ~4.1kg). There is a very small trade off with the short stainless extension required, but it's lightweight motorcycle tube, not car tube. Less weight not only improves power to weight, but every gram you don't have to swing from side to side improves the bike's change of direction. I'm confident the header alone is close enough to a 2kg weight saving to call it a 2kg weight saving.

The R1 system has the cat installed within the Y pipe so the header has no cat. Meanwhile the FZ1 OEM system has the cat in the header, which restricts flow and causes the engine to run a little hotter. I could have butchered out the cat from the OEM header, and I did that on my first FZ1, but it's a PITA and I'd rather not bother. In any case, the R1 header does make a little more power, but in my experience the lack of cat negates any loss of bottom end from the change in collector configuration.

I've used the R1 header on an FZ1 before (after having gutted the cat in the OEM header) and was extremely happy with the improvement. This thread is following a known recipe so I'm pretty confident this $180 mod is the right direction. For me at least. And I don't think I documented what I did with the original R1 header'd '06 FZ1 I owned, so here it is.
 
Picked this bike up 29 July 2022.

Issues immediately apparent:
- Steering stem bearings need attention
- There *was* an oil leak from somewhere, would need investigation, could just be the oil filter wasn't buttoned down. Dry oil everywhere.
- Fuel tank has a large but shallow dent
- Rear fender cover (tail lamp surround) has a couple of broken tabs
- Fender eliminator is ugly and chincy, and indicator mounts are upside down

Things I like:
- Dominator exhaust looks neat
- Vortex rearsets
- Nice SD-R levers
- Good quality LED indicators, with an LED flasher (not resistors)
- Colour scheme is quite fetching (I don't typically like the red/white Yamahas)

24,xxxkm bike. $6,500AUD.

View attachment 27542
Where did you buy those rearsets I cannot find any in stock for us online. Bike looks sweet!
 
Almost a month since an update, I'll try to put together what I've been up to. Here's a before photo, just for reference. This photo is basically 'as bought', just with a set of cheap bar end mirrors I had laying around. I quickly realised why they were just laying around and not on a bike, they are terrible CRG knock offs. The CRG mirrors are awesome, I had some on my Buell XB12S and previous FZ1N. The Chinese copies are a waste of $30. They're in the bin now.
View attachment 27605

Built a loft for my step daughter, which put a pause on working on the FZ1, but was a worthwhile project, especially for the Dad points. Don't worry about the fan, the house has A/C and the fan doesn't get used. She's been redecorating the room since then.
View attachment 27606 View attachment 27607

Ivan's ECU turned up. Turn around his end was extremely quick, same day service and dispatch. Shipping time was about 4 business days each way. Followed all his instructions for idle and TPS adjustment. Easy, but more importantly, a lot less effort than the way we used to modify these bikes with FCE, throttle plate modification, and power commander. Took the opportunity with the tank up to remove the O2 sensor and put a bung in the hole.
View attachment 27598

I fit and balance my own tyres, was doing it for the dirt bikes for years, doing road bikes takes a little more care but is no more challenging. Part of the reason I do my own is it's a great time to pay attention to wheel bearings and general wheel/brake condition, but also because I balance my wheels/brakes before fitting the tyre. Tyre shops will fit the light part of the tyre (barcode or dot) aligned to the valve stem. Here you can see the heavy point of the wheel is almost 80* out from the valve stem.. so I mark the inside of the wheel with a spray can, and will always align the tyre to that mark. This minimises the amount of weight required to balance the tyre. Red annodised valve stem, 90* type because checking tyre pressure should be easy. 300mm Discs are Metal Gear brand, I've used these guys for discs almost exclusively since they were so brilliant in assisting me work through the motard conversions we did a few years ago. They are 200g each lighter than the OEM discs with steel carriers, so a 400g saving in rotating mass and unspring weight; great for handling.
View attachment 27599

2019 R1 shock is fitted. Overall, I really like this mod; cheap, quick, easy, and has a really good outcome. It's no Penske like I had on my last FZ1, but currently is one tenth the cost, too. Modification of the upper bush was trivial, removed the bushes from the shock, used an appropriately sized bolt to align the bush on a piece of angle bracket, and used my bench disc to take the material off the face perpendicular to the axis. Measured with digital calipers often to ensure I didn't go too far. Light coat of zinc spray to prevent rust. Fit perfectly with a little bit of a shove, so a snug fit. Length of shock adjusted to the OEM FZ1 length of 320mm. Preload is set as high as I'm willing to go resulting is about 12mm of bike sag, rider sag is a little more than I'd normally like (about 5mm off my target), but it's close considering my 92kg (~200lb) dadbod. Clickers set to Sport Rider settings as a baseline. Rectifier fitted above the tray. Rear master reservoir relocated on a stainless bracket left over from another project. Braided brake hose fitted. No other rear brake modifications. Fitted the extra quiet insert in the Dominator exhaust which should knock about 6dB off. A lot quieter but still loud, glad I didn't opt for the other quiet insert, apparently it's 3dB louder. Michelin Road 6 in a 190/55, so should give a sportier attitude. Rear shock might be shortened up if the bike needs more stability with the taller tyre and shorter forks.
View attachment 27600 View attachment 27601

The headlight bracket frame on these bikes rusts. My greatest gripe with Yamaha for these bikes is that the surface coating was absolute rubbish, and to remove it to paint, the wiring loom for the ignition, immobiliser, and throttle side switch gear must all be removed. What a PITA. Anyway, I had the headlight off, forks out, tank up, and was pulling the triples off to re-grease and tension the head stem bearings, so I pulled the frame and painted.
View attachment 27602

Front end went back together. Seering stem bearings were in great condition, had clearly been greased before, but needed more tension. I suspect the tension nuts had worked loose. Cleaned, fresh grease, reassembled. Spent $3 on a copper crush washer to replace the chincy rubber one that comes from factory. Bearings shouldn't come loose again. '08 R1 Forks are 12mm shorter than OEM, so fitted the tops flush with the top triple. Clickers set to Sport Rider setting for the '08 R1 as a baseline. R1 axle is required because the bottom of the R1 forks is different. 2009 R1 calipers fitted up to the 300mm discs. Braided hoses. FZ1 hose hanger is different to the R1 hanger, so one of the locating tabs requires flattening. These 300mm discs and the slimmer calipers make getting the wheel on and off a lot easier too. Michelin Road 6 tyres are my weapon of choice. Rim stickers removed because I never like rim stickers, they aren't permanent enough, and I hate trying to keep them looking nice. Front fender was broken!! Didn't realise on original inspection, but is had been repaired (poorly) and there was goop and glue everywhere on the underside. Once I saw where the repairs were, I could find the hairline marks from the outside. If it failed again, the entire clutch side of the fender would come apart.. no bueno. I found a used black one for $36, painted it matt to black out the front end. I really like it.
View attachment 27603

Added a Renntec grab rail for the Misso, and a Givi EA131 Tanklock tank bag. Tail tidy is a Mustard Bikes unit, I like them because you can spec the indicator mount type you want, so I went with 10mm for aftermarket indicators. Rear indicators are Moto Gadget mo.blaze which are only 8mm stems, but a couple of O-rings on the stem ensures the 8mm thread is centered in the 10mm hole. Added a rear reflector because highway patrol in NSW can be dicks about the silliest things. Grips are Oxford fat grips. Risers are Neken 1-1/8" w/10mm mount bolts. Bars are Pro Taper Mini Low.
View attachment 27604

Really quick test ride and I'm happy with how tight it rides. Brakes aren't broken in yet but that Brembo RCS19 is brilliant.

Next update will be mirrors and GPS,

Great set up!

How are the black angled plates on you wheel balancer connected to the jack stands?

I am planning to make something just like this.
 
Back
Top