Navigation
Install the app
How to install the app on iOS
Follow along with the video below to see how to install our site as a web app on your home screen.

Note: This feature currently requires accessing the site using the built-in Safari browser.
More options
You are using an out of date browser. It may not display this or other websites correctly.
You should upgrade or use an alternative browser.
You should upgrade or use an alternative browser.
Healtech Gipro X-Tipe Gear Indicator
rjafz1000
Member
I actually just installed one last Saturday on mine and love it.
Sent from my LG-D800 using Tapatalk
Sent from my LG-D800 using Tapatalk
Morgstang
Well-Known Member
I actually just installed one last Saturday on mine and love it.
Sent from my LG-D800 using Tapatalk
They arent plug and play correct?...i was told you have to tap into 1 wire...
rjafz1000
Member
You have to plug it into the speed sensor, before the speedo drd or speedo healer if you have one. Then tap one wire for 12v switched. I used the hot wire for the brake switch that has a brown plug under the tank on the left side of the bike. Then you have to tap the crankcase sensor wire. If you follow the wire up from the crankcase on the left side of the bike it leads to a white 2 pole connector sitting horizontal kinda below the air box. I had to tap the grey wire to get it to work while other people had to tap the black wire on the other forum. Very very easy install. Last weekend in installed a speedo drd, gipro x gear indicator, 16 tooth front sprocket and hid headlights and the hids were the worst part of the whole thing. Hard to make all the wiring look pretty.
Sent from my LG-D800 using Tapatalk
Sent from my LG-D800 using Tapatalk
rjafz1000
Member
I was thinking backwards both the crankcase wire and the brown plug are on the right side of the bike if you would be sitting on it.
Sent from my LG-D800 using Tapatalk
Sent from my LG-D800 using Tapatalk
Morgstang
Well-Known Member
Thanks for the info...
ballmead
Wizard
I've had one for a few years now they are excellent. I've had no issues with mine and it works flawlessly.
ghetto_d
Well-Known Member
The best indicators are the integrated ones....
DenArnold
Wizard
was searching way too far, finally found a very good install guide on the Healtech site.
Time permitting this will be fitted next weekend
Below the link, may add this to the sticky subject on various mods GenII
http://healtech-electronics.com/docs/Supplementary Manuals/GPX-Y01_FZ1_2006-2013_en.pdf
Time permitting this will be fitted next weekend
Below the link, may add this to the sticky subject on various mods GenII
http://healtech-electronics.com/docs/Supplementary Manuals/GPX-Y01_FZ1_2006-2013_en.pdf
Blanchy
Wizard
Integrated mine into the tach and love it. This old thread on it
http://www.998cc.org/forum/gen-ii-mods/13680-gipro-x-type-gear-indicator-custom-install.html
http://www.998cc.org/forum/gen-ii-mods/13680-gipro-x-type-gear-indicator-custom-install.html
Last edited:
DenArnold
Wizard
Allright, I succesfully installed the Healtech Gipro X-type Gear Indicatoir on the Fizzer.
In support of future "wannadothistoo" members, below step by step pictures.
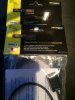
First ensure you have the right cable harnas to fit the Gen2 FZ1

1. remove the innerfairings


2. Remove the sadlles

3. remove the tankcover

4. easiest to work is to remove the fueltank and store it safe away.

In support of future "wannadothistoo" members, below step by step pictures.
First ensure you have the right cable harnas to fit the Gen2 FZ1

1. remove the innerfairings


2. Remove the sadlles

3. remove the tankcover

4. easiest to work is to remove the fueltank and store it safe away.

DenArnold
Wizard
5. Locate the white speed sensor connectors (may need to cut some tiewraps to have some slack onthe various cables)
Located at right side on the bike (eg seated on the bike your right side is...? right") )
)

6. as I had already installed the Speedohealer, you will have to connect the GearIndicator (GI) plugs in serie with the speedohealer plugs.
Be careful when disconnecting them. Use a small screwdriver to unlock the latches. Pulling too hard may tear the wire out the plug.

clean white ones are the GI plugs
Before plugging in, verify how your cable will need to be placed, as it may be handy to pull them through/over other wires or hoses.

All connected up

Located at right side on the bike (eg seated on the bike your right side is...? right
)
6. as I had already installed the Speedohealer, you will have to connect the GearIndicator (GI) plugs in serie with the speedohealer plugs.
Be careful when disconnecting them. Use a small screwdriver to unlock the latches. Pulling too hard may tear the wire out the plug.

clean white ones are the GI plugs
Before plugging in, verify how your cable will need to be placed, as it may be handy to pull them through/over other wires or hoses.

All connected up

DenArnold
Wizard
7. locate the crankshaft position sensor. on my bike it was positioned in the middle of the bike underneath (but visible) the airbox

8. disconnect the crankshaft pos sensor and free the left connector to ease your access to work on it.
Open the plastic sleeve (used a sciccor) and expose both wires

9. remove the insulation on the grey wire (1cm would be enough)

10. take the green/brown wire from the GI cable, strip approx 3 cm and fix it around the crankshaft grey wire as shown. In the meantime get your soldering iron warmed up.

Soldered

11. Protect the naked copper with electric tape, and put back the plastic sleeve and tape it up nice and tidy
12. Next locate the tail brake light plug (brown plug) on right side. This plug may be hidden in the cable loom. Cut the tie wraps if needed to get this plug out of the cable loom

13. Again open the plastic sleeve and expose both wires

14. remove the insulation for about 1cm as shown on the brown wire

DenArnold
Wizard
15. strip the red wire of the GI cable and wrap it around the exposed wire of the brake tail light

soldered

16. to mount the GI display, I made a quick metal support (2cm piece of Alu which I tapped around the tachometer and screwed it tight to on the of the screws)


17. run both cable of the wiring harnas towards the front (I ran it on the right side underneath airbox towards front and tied up on the fairing support bracket. Ensuring enough slackand ensure it does not get stuck between the forks and frame while turning the front
18. Connect both parts.
19. Turn ignition key on. If al good, the display will flash 6-5-4-3-2-1-L and remain in L position.

If not, recheck connections.
20. Mount the fueltank back on
21. Now you can start Learnign the GI indicator the different gears.
DenArnold
Wizard
22. Put the rear wheel off the ground using a paddock stand
23. Run the engine untill the idle rpm is reached normal idle and engine is warmed up
24. Pull the clutch and engage into 1st gear and rev the bike up to 3-4000rpm. The display will slowly flash 1 and followed by flashing2
25. Pull the clutch and engage into 2nd gear and rev the bike up to 3-4000rpm. The display will slowly flash 2 and followed by flashing3
.... up to 6th gear
26. Mount all stuff back
27. Put on your gear
28. go out for a ride
29. If the display Gears are incorrect, youcan reset the and restart the Learning process
To reset, kill the engine and swith on the red kill switch.
Turn the iginition key on and off a couple times untill the display flashes again 6-5-4-3-2-1-L.
You are now back in Learning mode
Repeat steps 24-25...
Last edited:
KyBoy
Well-Known Member
Very nice write up DenArnold. I'm installing my gipro tonight and tomorrow, got it all wired and flashing L. Have to button everything up tomorrow evening and make it look clean.
CrazyBiker
Wizard
Very helpful.