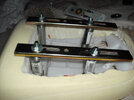
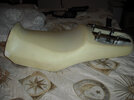
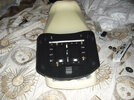
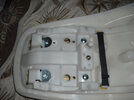
mounting bag to the seat

Almost Done!

Ok, here are a bunch of picts. It works fairly well. I placed it on the pan for future mods of bar backs, as mentioned before. Did not have to buy anything else. I moved the front bolts in so I had a flatter part of the pan to work with.
Under the pan, I cut off each end of the bracket supplied to fit right inside the reinforced part of the pan. The other supplied bracket is on top of the pan and provides support across the entire front edge of the case pan. If you can't see it in the photo, I cut the rear spacers out of conduit (you can see the approximate length). Using the holes in the bag bracket, they will hit a ridge in the pan structure, so I just notched out for it. The original bolt supplied are almost too short, so I am going to put in 2.5" with nylon lock nuts. The entire structure is solid. If you can see the bottom of the pan, you will see two stick on rubber pads to take up the slack and firm it all up. Once a find a metal band saw, I am going to cut along the lines of the pan bracket and then try to cover the entire piece. Wheels are still turnin'.
 
Ken! Nice job!!! Thanks for putting up the photos. I understand all of what you said and after looking once more at the bottom of the pan, I see the pads you added. My plan is much the same except I plan on using carriage bolts with the nylon lockers. I'll dremel the round holes to make square ones.

It is kind of nice that they give you so many holes in the pan to work with. Saves some metal drilling. :D
 
Extra holes

Ken! Nice job!!! Thanks for putting up the photos. I understand all of what you said and after looking once more at the bottom of the pan, I see the pads you added. My plan is much the same except I plan on using carriage bolts with the nylon lockers. I'll dremel the round holes to make square ones.

It is kind of nice that they give you so many holes in the pan to work with. Saves some metal drilling. :D

Just a note: you should use something to fill the two big round holes in the seat (that are there for venting the foam pad). Otherwise you will get water coming in when it rains. I used big flat washers with small holes and small stainless screw bolts. I cut a small ring of rubber hose to fit into the hole sandwhiched between the washers to make it water tight.

leespictures257.jpg
 
Last edited:
Holes fixed.

An update. I replaced the galvanized spacers with pvc couplings. They are perfect as they will never rust and plenty strong. They were the same length, so I just had to notch them out as I did the others. Then, since I had planned to buy another seat anyway, I put the pad back in (had to make holes for the pvc) and re-upholstered. I made the holes just large enough to get bolts in and fastened it all down. Since the vinyl is sandwiched between the both pieces, it should not tear. No one will be sitting on it anyway. It should hold up very well. I will get pictures up in a couple of days since I am not home at the moment.
 
I actually started my mock-up today. It was tricky trying to determine the best position for it with me seated. Once I was able to set it in a spot that was comfortable, I began looking at what holes would line up and where. I came up with my game plan and drilled the necessary holes for both my seat and my wife's seat where she is comfortable. Her FZ6R seat was a cinch!!! It had four perfect flat spots that are all at the same plane and lined up perfectly to where she likes the case to sit. Mine? Not so easy. One good flat spot for the rear bolt and the front bolts are going to be a bit of work to fit spacers properly.

Ken, I like the idea of reusing the seating materials to cover it all up! Since these are spare seats, it doesn't really matter if I poke four holes in them. :D Good plan!
 
Vinyl on!

Here are a few pics with the vinyl on. I put some spacers on the front to level it out a little. I plan on getting some matching paint soon and order an FZ1 logo to put on the top. A good vinyl back rest should make it quite comfortable for the long ride. More mods to come!
 
Thanks Ken! It appears that each time this is done, different points are used to mount the plates. :D I chose four different places to bolt on. The tricky part was getting it set up so that I was comfortable with the placement BEFORE drilling any holes.

Looks very cool with the seat materials back in place! Well done!!! :tup:
 
Holes?

Where did you try the holes? The place I put them, with the current bar setup, place it about 1 inch from my back, which allows for the backpad later. With bar backs and highway pegs, I should be able to get just the relief I am looking for. But, if I need to change it, I can just move it back another 1/2 to 3/4 inch if needed. I might actually order the larger bag just to have around if I go on a long trip. I think with the one I have and a good tank bag, I will be set.
 
Reusing pics

Here is where I placed them. The metal bar will cross three of them in a line in a very sturdy part of the front. The single rear bolt will be reinforced with metal as well. Here's the top and bottom shots marked up.

attachment.php


attachment.php
 
I should also say.... keep in mind that I will be using a hockey puck cut to size and form fitted that will spread the load over more plastic on the seats, THEN covered with the foam and seat materials. :D
 
Should work!

Looks good! I have a painter who is pretty good at matching and will be checking with him this week. I don't know how the finish will turn out, though. It is has quite a few dimples on the top. Maybe just flat blue match or black? It would take quite a bit of work to smooth it out. Any suggestions?
 
If I were you Ken, I'd save the money on the paint and stuff since I don't think this Sears case is going to last a long time. I'd save it toward a Shad or Givi case and just adapt their plate to the seat pan later. Then you can get a nice smooth case and often a matching color. :D
 
So true!

Yep! Maybe I will just find the paint and see what I can do. I have touch up guns and a compressor. It will do for the time being.
 
Gen1 Seat Mounted Case Progess Report

I cut the foam out of the middle of the passenger section then used pipe fittings and long screws to make the posts I put the mounting brackets on.
DSCF3022.JPG


DSCF3024.JPG


Then I mounted the plate using the supplied screws:
DSCF3025.JPG


I will replace the foam around the metal posts for the mounts then trim the rider portion of the seat for my short stature and replace the original cover. Here's a view from the bottom:
DSCF3027.JPG


One of my screws or bolts was messed up somehow so I need to get another one to tighten everything up before I can test fit it on the bike.
 
Nice work for theWolfTamer! :D Let's see pics of what the foam looks like after the rider section is done. Nice that you will be able to reshape it and lower your seat! Key is to slim the area where your thighs rest while at a stop and holding the bike up. Trim the seat narrow at that point and forward. Dish out the but area and if you can identify where your tailbone hits, dish that a little deeper to allieviate any pressure. Might be a good time to dish even more out and throw in a layer of gel too! :D
 
I was thinking about the gel too since I already have a lower seat. I'm hoping to make this one better as the one on the bike now seems to push me toward the tank more than the seat did in stock form.

My current low seat looks like who ever did it just took the "raised" part out and it feels like it's higher toward the passenger section than the tank. I was thinking to do the reverse of this and slant it toward the passenger section with a depression for my butt.

Since I'm curious to see how it all goes on, I'll end up delaying lowering it. I want to do more research, like pricing the gel and other foam options.
 
Thanks for posting such good pics, theWolfTamer! It gave me some good ideas for how to do the same thing on my Gen 2:

P1020768.jpg


P1020771.jpg


P1020773.jpg


P1020779.jpg


P1020776.jpg


P1020778.jpg


I wasn't digging the red molding that came on the trunk and will replace with some general black auto modling.
 
Back
Top